Setting up Burp Suite to work with Android emulator
Intercept and analyze traffic between mobile application and the server it communicates with is useful for mobile application pentesting. This post show how to setup Burp Suite with Android emulator.
Configuration used :
- Android 11 (API 30)
- Burp Suite 2024
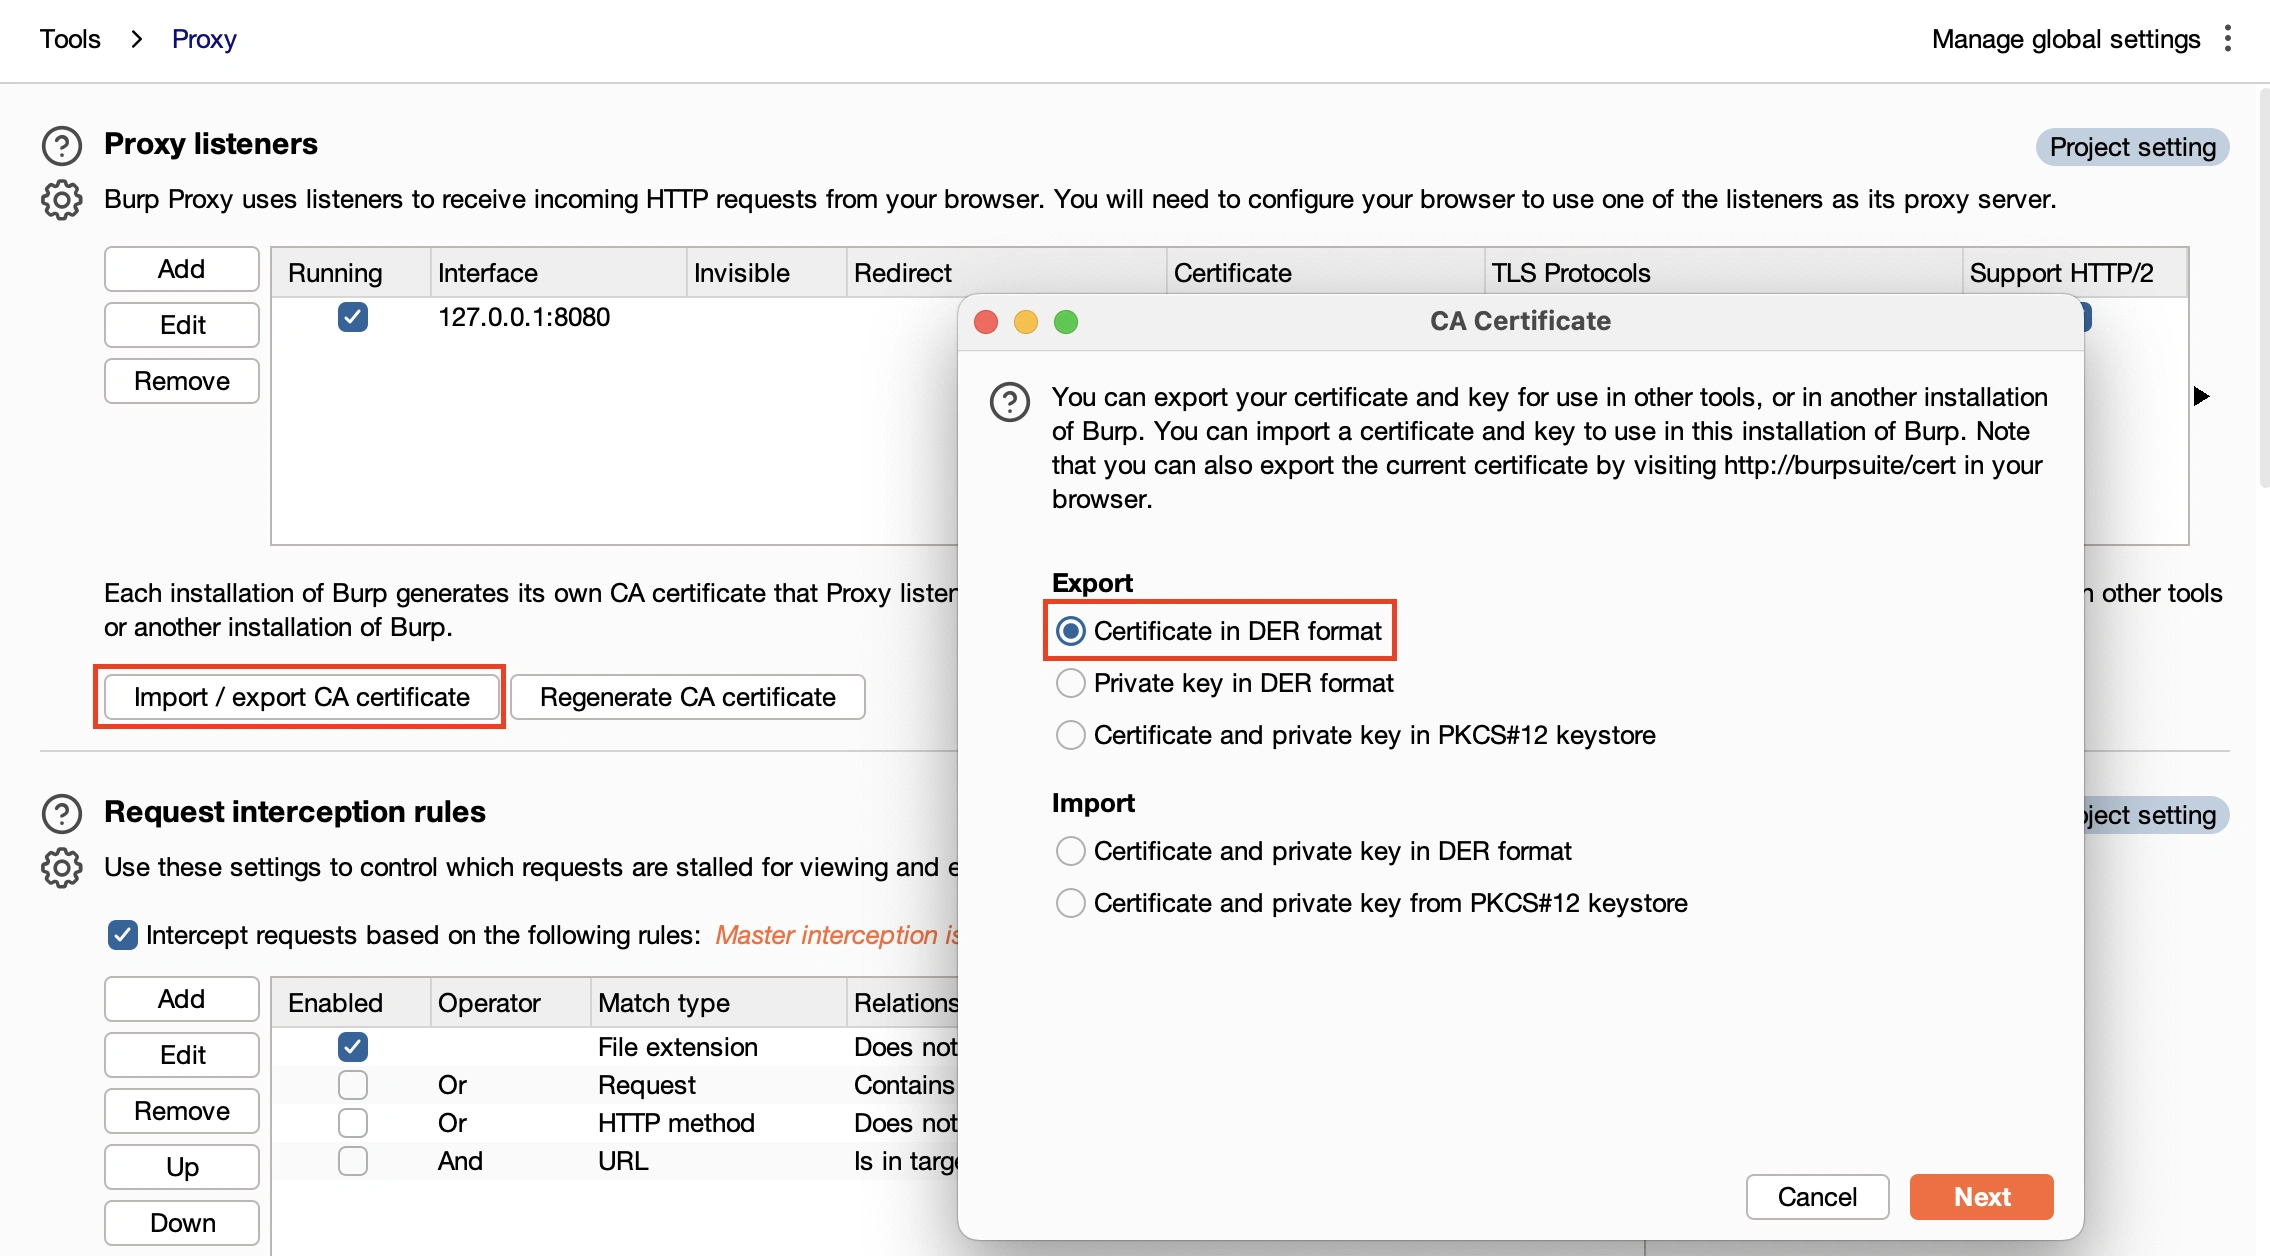
Export Burp Suite CA certificate
In Burp Suite, open proxy options and export CA certificate in DER format.
Android need certificate in PEM format with a specific filename subject_hash_old.0:
# Format and name conversion
openssl x509 -inform DER -in cacert.der -out cacert.pem
openssl x509 -inform PEM -subject_hash_old -in cacert.pem | head -1
mv cacert.pem <hash>.0
Push Burp CA to android emulator
For Android system, trusted CA are stored in /system/etc/security/cacerts/ folder. This folder need to be writable, we follow these steps to do so:
# Start android emulator with writable option
emulator -list-avds
emulator -avd <avd name> -writable-system
adb shell avbctl disable-verification
adb disable-verity
adb root
adb remount
Then, push CA certificate to emulator and move it to /system/etc/security/cacerts/
adb push <cert>.0 /sdcard/
adb shell
mv /sdcard/<cert>.0 /system/etc/security/cacerts/
chmod 644 /system/etc/security/cacerts/<cert>.0
reboot
After reboot, browse to:
- Settings
- Security
- Encryption & credentials
- Trusted credentials
- Find Port Swigger CA:

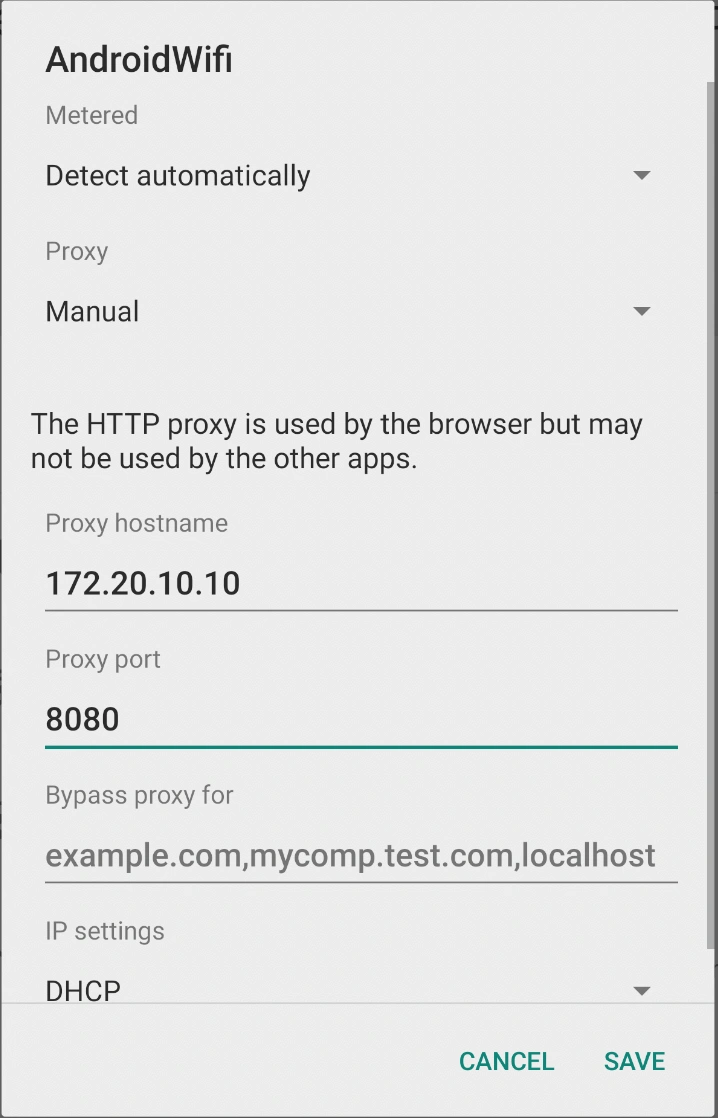
Configure proxy
Final step is to configure proxy.
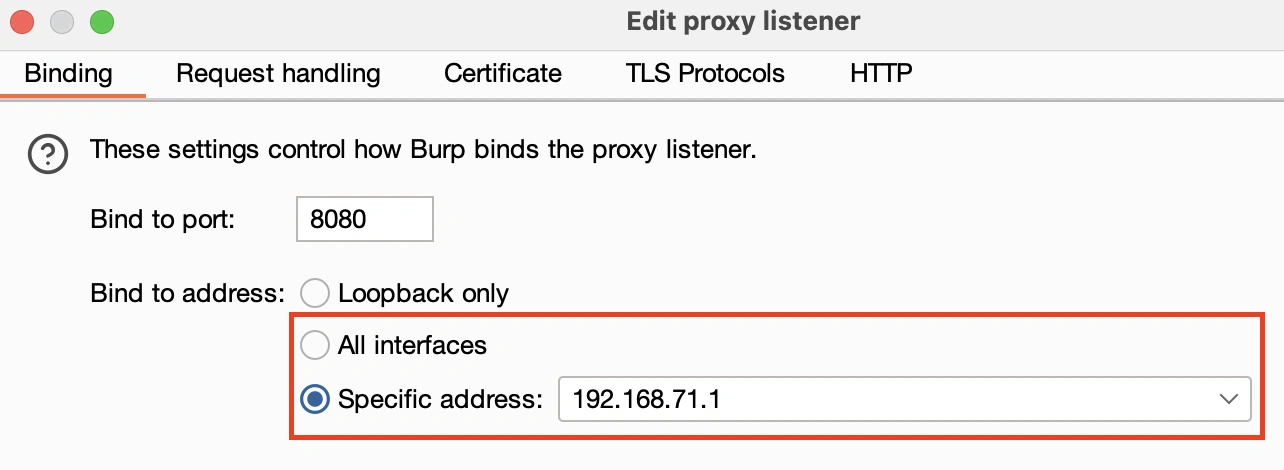
First, in Burp Suite, edit Proxy listener to bind to a Specific address or to All interfaces
Then, configure proxy in Android emulator by browsing to
- Settings
- Network & internet
- Wi-Fi
- Select your Wi-Fi network
- Edit configuration to add proxy settings